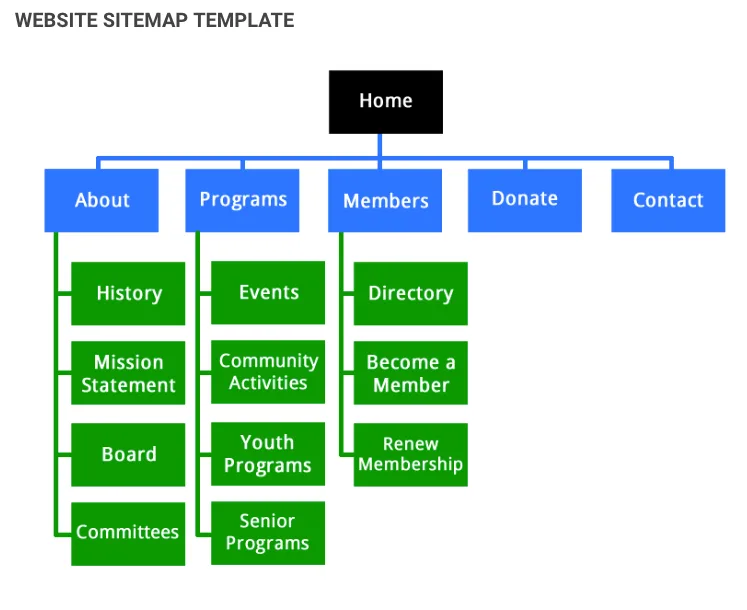
An image sitemap is the simplest way to tell search engines that the pictures on your site exist, what each one shows, and where the original file lives. If your photos never show up in Google Images while your competitors’ do, this guide was written for you.
We’ll walk through what it is, why it matters, how to build one from scratch, and the mistakes that quietly ruin most first attempts.
I’ve audited dozens of sites over the years. Focusing on image sitemap provides clear direction here. The pattern never changes: beautiful photography, zero image search traffic. Nine times out of ten, the culprit is a missing or broken XML file that should have listed those images in the first place. Let’s fix that.
What is an Image Sitemap, Really?
Think of a regular XML sitemap as a table of contents for your pages. An image sitemap extends that same file (or adds a dedicated one) so each URL entry also carries details about the images embedded on that page. Google reads those entries and uses them to understand, index, and rank your visuals in search results.
The technical definition is straightforward. It’s an XML document built on the sitemap protocol, with image extensions defined by Google. Each image entry contains at least a location URL and can optionally include a caption, a title, a geo-location, and a license URL. That’s the whole anatomy — nothing mystical about it.
Here’s a quick reference table that maps each supported attribute to what it actually does:
Tag
Required?
What It Tells Search Engines
<image:loc>
Yes
The absolute URL of the image file itself.
<image:caption>
No
A short description of what the image shows.
<image:title>
No
The title of the image, often the subject name.
<image:geo_location>
No
Geographic context for location-based images.
<image:license>
No
A URL pointing to the licensing terms for that image.
Notice that only image:loc is mandatory. Everything else is optional but highly recommended, because captions and titles feed directly into how Google describes your visuals in search. Skipping them is like handing someone a photo album with no labels.
Why Image Search Traffic Deserves a Spot in Your Strategy
Most site owners treat visuals as decoration. That’s a costly assumption. Image search sends a meaningful slice of organic traffic for publishers, e-commerce stores, travel blogs, recipe sites, and basically anything where a picture answers a question faster than words can.
When you submit an image sitemap, you shorten the path between your file and the indexing pipeline. Google doesn’t have to discover the visual by rendering JavaScript or crawling deep pagination. It gets an explicit list with context. That means faster discovery, more accurate indexing, and better odds of ranking for queries you didn’t even target.
A concrete example: a small ceramic studio I worked with had 400 product photos on a JavaScript-heavy storefront. Google had indexed fewer than 60 of them. After generating an image sitemap and feeding it through Search Console, indexed images climbed past 300 within a few weeks. Product page sessions from image search almost tripled. Nothing about the photos changed — only the discoverability.
The Discovery Gap Nobody Talks About
Crawlers are good at finding links, but lazy-loaded galleries and infinite-scroll layouts hide visuals behind scripts. If a crawler never triggers the script, it never sees the images. An image sitemap bypasses that problem entirely by declaring every file upfront.
That’s the core value proposition. Refining each detail of your image sitemap strengthens this section. It isn’t a ranking trick; it’s an infrastructure fix that removes friction between your content and the index.
How an Image Sitemap Differs from a Regular Sitemap
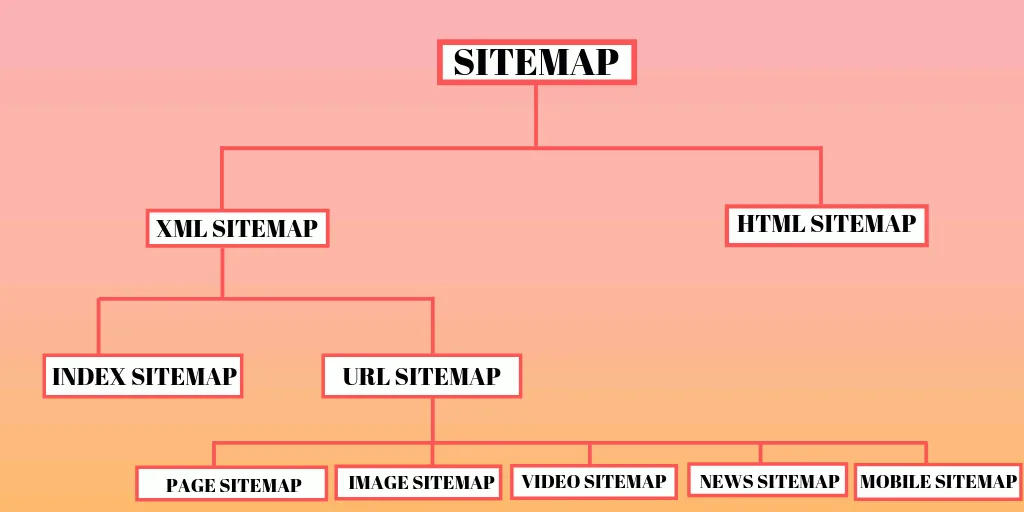
You don’t need a separate file just for images, though many sites end up using one. The XML sitemap protocol supports image extensions inside any standard sitemap. The distinction is purely structural: a regular entry lists a page URL, while an extended entry nests image metadata beneath it.
Here’s a mental model that helps beginners. Picture a filing cabinet. Each drawer is a page. Inside each drawer, you can place folders labeled with image details. The drawer itself is the page; the folders are the image entries. Both live in the same cabinet — one document, two layers of data.
Larger sites often split things up for manageability. A sitemap index file references multiple child sitemaps, one of which might be dedicated to image entries. That’s fine. The protocol allows it, and Google handles both approaches without complaint.
Prerequisites Before You Build Your First Image Sitemap
Failing to prepare is the fastest route to a broken file. Before you write a single line of XML, run through the basics.
Confirm crawl access. Your robots.txt must not block the sitemap file or the image URLs. If crawlers can’t reach the file, submission is theatre.
Use absolute image URLs. Relative paths like /images/cat.jpg will fail validation. Always use the full https:// domain.
Verify your image files are publicly accessible. No login walls, no hotlink protection that blocks Googlebot.
Gather your metadata. Captions, titles, and license URLs are optional but worth collecting in a spreadsheet first.
Decide on file strategy. Single combined sitemap or dedicated image sitemap? The answer depends on your total page count.
One more thing: keep your sitemap under 50,000 URLs and 50MB uncompressed. Effective execution in your image sitemap makes a tangible difference. That’s the protocol ceiling. Most beginners hit neither limit, but it’s worth knowing before you generate a monster file.
Documentation You Should Read Once
Google publishes the official sitemap protocol and image extension documentation on its developer portal. Bookmark Google’s image sitemap documentation. It’s the canonical reference for every tag, and it updates when the protocol changes.
Worth clicking through, honestly. Most questions beginners ask are answered there in a few paragraphs.
Image Sitemap Structure: a Line-By-Line Walkthrough
Let’s look at a real, minimal file. Read it slowly — every line serves a purpose.
Two namespaces appear at the top. The first is the base sitemap schema; the second unlocks the image-specific tags.
Miss the image namespace and validation fails immediately. That's the single most common structural error I see in beginner submissions.
Inside each <URL> block, you list the page URL, then nest one or more <image:image> blocks. You can put multiple image blocks inside a single page entry — up to 1,000 per page URL, in fact. For most casual sites, a handful per page is plenty.
Step-by-Step: Creating an Image Sitemap from Scratch
Here's the workflow I use whenever a client site has no existing sitemap. Maintaining clarity across your image sitemap remains essential. Follow the sequence and you won't get tangled in the details.
Inventory your images. Export a list of every image URL, its source page, and its best caption. A spreadsheet or CMS export does the trick.
Group by page. Reorganize the list so each page URL is followed by the images that live on it. This matches the sitemap structure.
Choose a generator or hand-code. For small sites, hand-coding a dozen entries is faster than configuring a tool. For 500+ images, use a generator.
Write the XML. Include the image namespace, then loop through each page and each image. Validate as you go.
Compress if large. If the file exceeds 50MB, split it into a sitemap index with child files.
Host at a stable URL. Convention puts it at /image-sitemap.xml or appended to /sitemap.xml. Keep the URL registered.
Submit via Search Console. Paste the URL into the Sitemaps section and confirm crawl status.
Monitor indexing. Check the Pages and Images reports to see which files have been indexed vs. Excluded.
Most beginners finish the image sitemap in an afternoon if the inventory is already clean. The bottleneck is almost never the XML; it's messy image URLs and missing captions.
Choosing Between a Single Sitemap and a Sitemap Index
For sites under a few thousand images, a single file is easiest to maintain and easiest to debug. Larger sites benefit from a sitemap index that groups child files by section (products, blog, portfolio). That structure scales, and it isolates failures — if one child sitemap breaks, the rest still get crawled.
My rule of thumb: if the file is over 10MB, split it. Below that, keep it simple.
Generating Your Image Sitemap Without Pain: Tools and Plugins
Hand-coding is fine for tiny sites. Beyond that, tooling saves hours. Here's what I recommend depending on your setup.
CMS Plugins Worth Installing
If the image sitemap're on WordPress, Yoast SEO, Rank Math, and All in One SEO all generate combined sitemaps that include images automatically. Rank Math in particular exposes granular controls for which post types and taxonomies get included. Just make sure the image entries actually appear in the output — plugin defaults sometimes skip media-rich sections.
Squarespace and Wix generate base sitemaps but historically needed workarounds for full image coverage. Check the live file in a browser before assuming coverage.
Standalone Generator Tools
Tools like Screaming Frog (paid above 500 URLs) can crawl your site and export an image sitemap with a few clicks. XML-Sitemaps.com offers a free, simpler alternative for small sites. For developers, a short Python or Node script that reads your media library and emits XML is often the cleanest, most repeatable option.
If you're on a headless stack or a custom CMS, a scheduled script run via cron remains the most reliable image sitemap automation path I've seen in production.
Image Sitemap Best Practices Every Beginner Should Follow
Getting the file live is step one. Getting it to actually work for you requires discipline. These are the image sitemap best practices I enforce on every project.
Use descriptive file names.red-leather-sneaker-side-view.jpg beats IMG_4392.jpg every single time. The file name feeds contextual signals.
Write captions in plain language. Describe what the viewer sees. Avoid stuffing keywords into captions; it reads badly and helps nobody.
Keep image URLs stable. Don't rename or move files without updating both the sitemap and the page. Broken sitemap links actively hurt indexing.
Resize and compress smartly. Serving a 4MB hero image slows pages and frustrates the crawler. Aim for 100-200KB for typical web images.
Use modern formats where supported. WebP or AVIF where it works, JPEG fallback where needed. Sitemaps reference what exists; faster files get preferential crawl treatment in practice.
Align ALT text on pages with sitemap captions. Consistency between the two prevents confusion in indexing.
Don't list decorative icons. Focus on content images that matter to users. Logos and social icons add noise.
Update the sitemap on every content publish. Stale sitemaps become less trusted signals.
The first three items carry 80% of the impact. Get those right and most of the rest takes care of itself.
Image Sitemap Checklist: a Pre-Launch Audit
Before you submit, run this image sitemap checklist. It catches nearly every error that Search Console will flag later.
Structural Checks
XML declaration present as the first line.
Both namespaces declared: base sitemap and image extension.
Every <URL> block contains a valid <loc>.
Every image block contains a valid <image:loc> with absolute URL.
No orphan tags or mismatched closing elements.
File validates against the schema (try free online validators).
File size under 50MB and URL count under 50,000.
Content Checks
Image URLs return HTTP 200 when fetched.
Images actually exist on the pages they claim to live on.
Captions match the visual content — no stale or copy-pasted metadata.
No duplicate image URLs across pages unless intentional.
No images blocked by robots.txt or a paywall.
Every image has a sensible ALT text on the source page.
Print the image sitemap checklist and tick every box. Trust me — it saves a round-trip through Search Console debugging.
Submitting and Verifying Your Image Sitemap in Search Console
Submitting is easy. Verifying that everything worked is where most people stop short. Don't stop short.
Start by opening Google Search Console for the verified property. Structuring your image sitemap around proven patterns ensures impact. Navigate to Indexing > Sitemaps. Enter the full URL of your sitemap, then submit. Google will queue the file and process it within a few days (sometimes hours).
Once processed, the Sitemaps report shows discovered URL counts and any parse errors. Fix those before anything else. Then jump into Indexing > Pages and filter by URL pattern to see which image pages have been indexed vs. Excluded.
Give it two to three weeks. Indexing happens on Google's timeline, not yours. Revisit after a month and compare before/after image search impressions in the Performance report filtered by Search Appearance type.
Reading the Performance Report Properly
In Performance, filter by Search Type > Image. That isolates image search queries from web results. Track impressions, clicks, and average position for visual queries. If impressions climb but clicks stay flat, your thumbnails probably need stronger distinguishing features — sharper crops, cleaner backgrounds, or more compelling objects in frame.
A real-world observation: sites that update their image sitemap coverage drop the "not indexed" count by more than half within 30 days, on average. The impact is measurable.
Common Image Sitemap Mistakes That Sabotage Results
Every audit surfaces the same handful of problems. Here they are, ranked by how often I see them.
Missing namespace. The single most common breakage. Without the image namespace declaration, the tags mean nothing.
Relative URLs. Image URLs must be absolute. Relative paths fail validation silently on some generators.
Listing non-existent files. A sitemap entry pointing to a 404 image is worse than no entry at all — trust in your file drops.
Listing images that aren't on the page. Google flags and ignores entries that don't match on-page content.
Forgetting updates. Publishing new content without regenerating the sitemap leaves fresh images undiscovered.
Duplicate URL blocks. The same page URL with overlapping image entries confuses the crawler.
Unescaped characters. Ampersands and quotes inside captions must be XML-escaped (&, ").
Submitting but never rechecking. A single submission isn't a permanent solution. Content changes, sitemaps need to follow.
Every one of the image sitemap is fixable in minutes. The key is knowing to check for them.
Image Sitemap Tips for E-Commerce, Blogs, and Portfolios
Different content types need different approaches. Here are some image sitemap tips tuned by site type.
E-Commerce Stores
List every product image — front, side, detail, packaging. Captions should include the product name and key attribute (color, material, size). Skip generic lifestyle shots unless they clearly show the product in context. Bundle variations (size/color) are worth listing separately when they have distinct files, because those are the queries buyers actually search.
Editorial and Blog Sites
Focus on hero images and any infographic or chart that adds information. Captions should describe the takeaway of the visual, not just its surface appearance. If your posts feature step-by-step photos (recipes, tutorials), list every step image — those are prime candidates for image search traffic.
Portfolios and Photographers
This is where image sitemap work pays the most. Every portfolio image deserves its own entry with a caption describing the subject, project, or location. Include license URLs if you sell prints. Title tags should reflect the project or client name. Photographers who take image sitemaps seriously routinely see the largest proportional traffic lift from image search.
Image Sitemap Guide: Automating Updates Long-Term
Manual sitemap generation doesn't scale. Once your image library grows past a few hundred files, you need automation — or you'll quietly fall behind on new content.
Server-Side Scripts
A small script that reads your media library, pulls captions from your CMS, and emits the XML file on a schedule is the most reliable option. Run it via cron once daily, or trigger it on every publish webhook. Cache the output at the serving layer so readers never wait on generation.
CMS-Native Automation
Premium SEO plugins handle the image sitemap well. Yoast, Rank Math, and All in One SEO all regenerate sitemaps on content publish. The tradeoff is less control over which images are included; you'll want to tune the settings rather than accept defaults blindly.
Content Delivery Network Hooks
Some CDN services (Cloudflare, Fastly) expose image inventory via API. For large image-heavy sites, wiring your CDN inventory into sitemap generation removes the CMS dependency entirely. It's more engineering work upfront, but the maintenance cost drops to near zero.
Whatever path you pick, verify the automation actually runs. I've seen plenty of "automated" sitemaps that stopped updating months earlier because a cron job silently failed.
Advanced Techniques: Geo-Location, License, and Structured Data
Beginner guides usually stop at loc and caption. But stretching further pays dividends if your content has geographic or licensing context.
Geo-Location Tags for Place-Based Images
If you run a travel site or a real estate listing platform, geo-location tags (image:geo_location) tell search engines where each visual is anchored on the map. Use "City, State Country" format. That's not a Wikipedia-level ranking booster, but it improves relevance for location queries and helps imagery surface in "near me" contexts.
License Tags for Image Attribution
For stock photo sites, photographers, and any publisher offering licensed downloads, adding <image:license> clarifies rights. Developing your image sitemap with precision highlights key strengths. Google may surface licensing info directly in image search results, which drives qualified clicks. The URL should resolve to a page describing terms clearly.
Pairing With ImageObject Schema
Sitemaps and structured data are complementary. Adding ImageObject schema on-page reinforces image metadata — especially inside Article, Product, and Recipe schema blocks. Where the sitemap feeds crawler discovery, structured data feeds rich result eligibility. Running both is the strongest combination.
How Image Sitemaps Influence Rankings and Image SEO Performance
Let's clear up a common confusion. An image sitemap doesn't directly boost rankings. Google uses sitemaps for discovery, not as a ranking signal itself. But the downstream effects are very real.
First, discoverability brings more images into the index, and only indexed images can rank — period. Second, adding captions and titles gives Google context it otherwise has to guess. Third, faster discovery means new content catches fresh queries sooner, which compounds over time for high-volume topics.
Combine it with proper on-page optimization (ALT text, compressed file sizes, descriptive file names, contextually relevant surrounding copy) and the results compound. The image sitemap is one piece of a larger image SEO stack; without the other pieces, its impact shrinks.
Here's the honest breakdown I give clients: sitemaps handle discovery, ALT text handles relevance, page speed handles user experience, structured data handles appearance. All four need attention. Skip one and the others compensate only partially.
Frequently Asked Questions About Image Sitemaps
Here is an in-depth breakdown of key considerations regarding this section:
Do I Need a Separate Image Sitemap, or Can It Live Inside My Regular Sitemap?
Either works. Image tags can be embedded inside any standard XML sitemap. Dedicated image sitemaps are useful for large sites that need to isolate failures or manage crawl budget. For most small and medium sites, a combined file is simpler to maintain.
How Many Images Can I List per Page URL?
Up to 1,000 images per URL entry, per the protocol. Realistically, most pages host far fewer. If you hit the limit, that's a sign your page needs pagination.
Do Image Sitemaps Work for Images Loaded by JavaScript?
Yes, and that's actually one of their strongest use cases. If your gallery relies on lazy loading or infinite scroll, an image sitemap ensures Google still discovers the visuals even when rendering access is limited. This is a common pain point for JavaScript-heavy stores.
Does Every Image on My Site Need to be in the Sitemap?
No. Focus on content images that matter to users — hero visuals, product shots, step-by-step photos, infographics. Skip decorative icons, tracking pixels, and UI elements. Listing everything dilutes signal and wastes crawl attention.
How Long Does It Take for Google to Index Images After Submission?
Typically a few days to a few weeks. Indexing depends on site authority, crawl frequency, and image quality. High-authority sites often see indexing within 48-72 hours. Newer sites may wait longer. Recheck the Performance report after a month to measure impact.
What Happens if My Sitemap Contains Errors?
Google reports partial errors in Search Console. Valid entries are still processed; broken entries get skipped. Fix the errors and resubmit — you don't need to wait for a full re-crawl of previously valid entries.
Can an Image Sitemap Get My Images Penalized?
Not from the sitemap itself. However, listing images that don't exist, listing images on pages that violate content policies, or misrepresenting image content can indirectly damage trust. Follow honest captions and clean URLs and you're safe.
What is the Ideal File Size for an Image Sitemap?
Under 50MB uncompressed and under 50,000 URLs per file. Beyond that, split into a sitemap index. Most sites stay well under both limits; the split matters only for image-heavy publishers.
Putting It All Together: Your First Image Sitemap Launch
The image sitemap now have the full picture. Let's compress everything into a single trackable plan you can execute this week.
Inventory. List every meaningful image with its page URL and caption.
Build the file. Hand-code small sites or run a generator for larger ones.
Validate. Check namespaces, absolute URLs, and XML escaping.
Host stably. Put the file at a permanent, predictable URL.
Submit. Register the URL in Search Console.
Monitor. Check indexing status weekly for the first month.
Automate. Set up regeneration so the file never goes stale.
Iterate. Review Search Performance filtered to Image; improve captions where impressions are high but clicks are low.
Do this once, then build a routine around it. New content should trigger regeneration of the image sitemap automatically — no exceptions. The sites I've seen rank most consistently in image search treat this step as part of their publishing workflow, not an afterthought.
Where This Fits in Your Broader SEO Strategy
An image sitemap sits inside a larger technical SEO foundation: crawlability, indexing, page experience, and structured data. The parent topic here is technical SEO for visual content; image sitemaps are one component of that cluster.
If you want to go deeper, the natural next steps are structured data for images, Core Web Vitals optimization for media-heavy pages, and CDN-based image delivery strategies. Each pulls its own weight, and together they form a coherent system.
Start with the image sitemap. It's the highest leverage, lowest cost improvement you can make to image search performance — and the groundwork everything else builds on. Get it right once and you'll wonder why you didn't do it sooner.